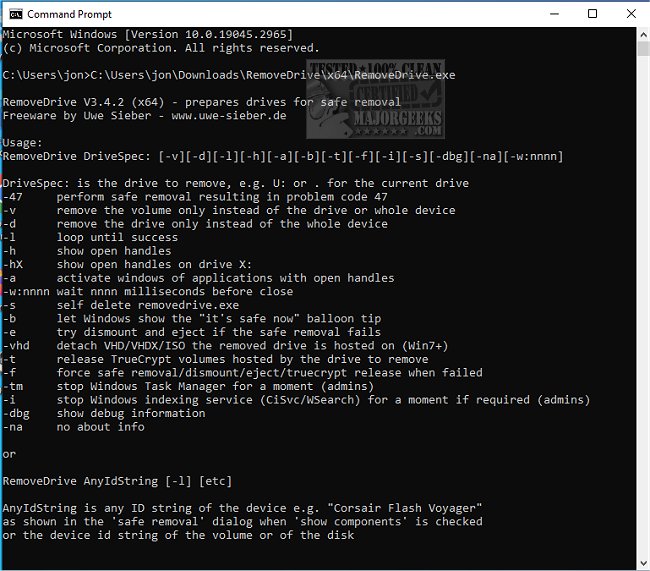
RemoveDrive enables you to prepare for drive removal via the command line safely, ensuring that fact before you physically remove it.
RemoveDrive is a handy tool that provides a quick and efficient way to eject your removable drives quickly. Whether you're dealing with USB drives, SD cards, or any other type of removable storage, RemoveDrive is a tiny software that can help you get the job done quickly and easily.
With RemoveDrive, you can prepare for the removal of your drives through the command line. This means you won't have to deal with any errors that might pop up during the ejection process. Plus, you won't have to worry about which letters are commonly attributed by Windows, as RemoveDrive isn't dependent on them. Instead, you can use the device's ID string in your command to achieve the same result. You can even use wildcards like "Flash" to eject the first drive with that keyword in the name.
If you're interested in using RemoveDrive, there are both 32 and 64-bit versions available in the archive. The 32-bit version works on Windows XP and higher, while the 64-bit version only works on 64-bit versions of Windows. So, no matter what type of system you're running, RemoveDrive is a great tool to have in your toolkit.
Usage:
RemoveDrive DriveSpec [-47][-v][-d][-f][-l][-h][-a][-b][-i][-s][-na][-w:nnnn]
DriveSpec is the drive to remove, e.g., U: or an NTFS mountpoint as "C:\CardReader\Multi Reader SD"
or . for the current drive
or \ for the drive of the RemoveDrive.exe
or a volume name like \\?\Volume{433619ed-c6ea-11d9-a3b2-806d6172696f}
or a kernel name like \Device\HarddiskVolume2 (Volume)
or a kernel name like \Device\Harddisk2\DR0 (Disk)
or a partition name like \Device\Harddisk2\Partition1
or a device ID
or a friendly name like 'Corsair Voyager'
Wildcards can be used.
-47 perform safe removal, resulting in problem code 47
-v remove the volume only instead of the drive or whole device (needs admin privileges)
-d remove the drive only instead of the whole device (needs admin privileges)
-f force safe removal when failed (needs admin privileges, Vista+)
-L loop until success
-t 'eject' TrueCrypt volumes hosted by the drive to remove
-vhd detach VHD/VHDX/ISO the removed drive is hosted on (Win7+)
-h show open handles
-h:X shows open handles on a different drive (e.g., a TrueCrypt volume whose container is on the drive to remove)
-a activates Windows of applications owning the open handles
-w:nnnn wait nnnn milliseconds before close
-s self delete removedrive.exe
-b shows the "Safe now to remove Hardware" balloon tip
-tm stop Windows Task-Manager (needed unter Windows 10+ if the drive is shown on the performance tab)
-tmr same as -tm but re-starts the Task-Manager afterward
-i stop Windows indexing service (XP: CiSvc, Vista+: WSearch) for a moment if required (need admin privileges)
-na no about info
-dbg shows debug information
Parameters are case-insensitive.
Only one drive or device is prepared for safe removal.
Sample:
removedrive U: -L -H -A -W:1000
Similar:
Video: How to Create a Safely Remove Hardware Shortcut in Windows 10 & 11
The Ultimate List of Every Known Command Prompt and PowerShell Commands
PowerShell and Command Prompt 101
10 Ways to Open the Command Prompt in Windows 11
How To Run Windows Terminal, PowerShell, or the Command Prompt as Administrator
Download


